Arch Linux is a fully independent Linux distribution with a rolling-release model. It’s loved for being incredibly minimal, configurable and rewarding to use because of how much you learn in setting it up exactly as you like it.
The official Arch installation guide is the main guide to consult. Everything else is not guaranteed to work. These notes just collect some pointers on pitfalls I ran into and how I resolved them as well as directions for further customisation.
Installation (Dual Boot Windows and Arch Linux)
This section provides instructions I used to set up a dual booting Windows 11 and Arch Linux system. This assumes you’re currently running Windows 11 in UEFI BIOS mode with GPT formatted drive, and that you want to install Arch Linux as the second operating system.
I sourced these instructions from the official installation guide and Ksk Royal.
Note: Instead of a GUI installer, you just get a command-line prompt. Installing Arch Linux is a matter of issuing a bunch of commands correctly. Logging all these commands for future reference or troubleshooting is a very good idea.
Creating the Installation Media
- Get the official Arch Linux ISO file.
- On Windows, you can create a bootable USB drive with the Arch Linux ISO using Rufus.
Creating the Disk Partition
Using Windows’ Disk Management, create a partition with unallocated space for the Linux installation. I did this by shrinking the Windows partition and giving myself around 500GB.

Note: When you do things like create or delete partitions, you’re directly modifying the partition table in the boot sector (a dedicated part of storage drive for holding the partition scheme) as specified by MBR or GPT.
Booting the Installation Media
- Mash the Del key until the UEFI GUI appears.
- Ensure ‘Secure Boot’ option is disabled. This can be re-enabled after installation.
- Set the boot order so that the installation media appears as the first in the list. Save and restart and you’ll boot into the installation media.
Keyboard Layout and Font
By default, the keyboard layout is English US. In Australia, this is already what we want to use, so there’s no need to run loadkeys.
# Show all qwerty keyboard layouts.
ls /usr/share/kbd/keymaps/i386/qwerty

# If a different layout is desired, load it with:
loadkeys $PATH_TO_KBD_LAYOUT_FILE
Terminal fonts are stored at /usr/share/kbd/consolefonts. Set fonts with setfont.
setfont $FONT_NAME

# Recommended: run this command to make the font more readable:
setfont ter-132n
Internet Connection
In my case, I want to connect to the wireless home network only, and I have a wireless network interface that ships with my motherboard (ROG STrix x570-E).
# Lists your network interfaces. Confirm the one you want to use is here.
ip link

# Prints a table showing whether or not your wireless network interface is blocked.
rfkill
The process for connecting to the wireless home network involves using iwctl (internet wireless control utility). The iwctl CLI is a way to talk to the iwd Daemon running in the background.
- ️Note: I needed to turn off ‘fast boot’ or ‘fast startup’ through the Windows control panel to get the wireless network interface to show up in the output of
ip link. - DHCP should work out of the box for WLAN network interfaces.
# Connect to wireless network using iwctl. Running the command below launches an
# interactive prompt
iwctl

[iwd]# help
[iwd]# device list                             # Shows all wireless devices.
[iwd]# station wlan0 get-networks              # Scan for available networks. Replace wlan0 with different device name if required.
[iwd]# station wlan0 connect "MyNetworkName"   # Connects to the network after password prompt.
[iwd]# exit
Now, sanity check that you’re connected to the internet with: ping archlinux.org -c 5.
System Clock
Set the system clock using timedatectl.
timedatectl list-timezones
timedatectl set-timezone Australia/Sydney # → use Sydney’s timezone.
timedatctl status                         # → use this to verify that the local time is correct.
Creating Partitions
First, let’s identify each drive connected to this machine and their partitions.
# Lists your storage devices (called 'block devices') and their disk partitions.
# This shows your hard drive, as well as USB drives.
lsblk
fdisk -l # Like `lsblk`, but shows more information.- Note: We will be installing the GRUB boot loader in
/dev/sda1. In my case, my/dev/sdadevice is my main hard drive, but this should be confirmed withfdisk -l. - Drive names:
/dev/sda1is the first partition of the first drive (the ‘sd’ means SATA device, the ‘a’ is just an identifier for the drive, the number is the partition number). Similarly,/dev/sdb2would be the second partition of the second drive.
I have a motherboard with UEFI and I use the GPT partition scheme (note that Windows 11 only supports GPT). Now, we need to create:
- An EFI system partition of at least 300MiB. In my case, I intend to use .
- Optionally, a swap partition of at least 512 MiB. In my case, I intend to use 6GB, which is recommended for systems with 32GB of memory.
- A Linux filesystem partition. I like to split this up into a root partition and a home partition to enforce clearer boundaries.
- Root partition should be at least 8GB. I will use 40GB.
- Home partition will be allocated the remaining unallocated storage space.
This is the layout I intend to use:
| Mount point | Partition | Partition Type | Size | Comments |
|---|---|---|---|---|
/mnt/boot | /dev/sda1 | EFI system partition | 100MB | Since I’m installing Arch Linux from a working Windows 11 setup, this partition already exists. Windows 11 uses the GPT partition scheme. This is the partition we’ll install the GRUB boot loader to. |
[SWAP] | /dev/sda6 | Linux swap | 6GB | Optional. |
/mnt | /dev/sda5 | Linux root (x86-64) | 40GB | |
/mnt/home | /dev/sda7 | Linux filesystem | Remaining unallocated space. | This is for all the user’s personal files. |
To create this layout, launch cfdisk /dev/sda. This starts an interactive UI that lets you manage partitions on sda. This is basically a neat wrapper around fdisk.
For my own reference, here’s some details about the partitions in my setup:
NAME    SIZE    PARTITION TYPE                  FILESYSTEM TYPE

sda1    100M    EFI System                      vfat
sda2    16M     Microsoft reserved
sda3    344.9G  Microsoft basic data            ntfs
sda4    604M    Windows recovery environment    ntfs
sda5    50G     Linux root (x86-64)             ext4
sda6    6G      Linux swap                      swap
sda7    529.9G  Linux filesystem                ext4
Aside: I was a dumbass and wiped the sda1 partition. This meant when I installed GRUB, the menu would not show Windows as an option. The following links helped me resolve it. It was a very quick resolution, I just remember running efibootmgr to check that the Windows Boot Manager was still there, then I reinstalled GRUB.
- Accidentally deleted Windows bootloader.
- What to do if you accidentally format your EFI partition in a dual-boot setup.
Formatting Partitions
Formatting a disk partition generally means setting up a filesystem for it. We’ll use Ext4 filesystems here.
For each of the partitions created from before:
- For the root partition: run
mkfs.ext4 /dev/<root_partition>. - For the home partition: run
mkfs.ext4 /dev/<home_partition>. - For the swap partition: run
mkswap /dev/<swap_partition>, then runswapon /dev/<swap_partition>to tell the OS that it’s free to use this partition as a swap partition.
Use lsblk -f to confirm what filesystem has been set up for each partition.
Now that we have the EXT4 filesystem set up for the root and home partitions, we need to tell the OS that they’re accessible by using mount and supplying a mount point, which is a path at which we can access the partition. ‘Mounting’ is the attaching of a filesystem to a specific path. A command like mount /dev/sda2 /mnt makes the filesystem in sda2 partition available under the path /mnt, which you can seamlessly read/write to.
# Mount the root partition.
mount /dev/sda_ /mnt

# Mount the home partition.
mkdir /mnt/home
mount /dev/sda_ /mnt/home
Now use lsblk to confirm that all the partitions have the right mounting point set.
Note that mount does not cause the mounting operation to persist after shutdown. The persistence is set up later in generating filesystem tables.
Setting up Fast Mirrors
Pacman packages are downloaded from the mirror servers listed in /etc/pacman.d/mirrorlist, which contains a sorted list of mirror servers to attempt to download packages from.
# Create a backup file for the original mirrors.
cp /etc/pacman.d/mirrorlist /etc/pacman.d/mirrorlist.bak

# Updates the package database to latest versions.
pacman -Sy

# Gives you the `rankmirrors` bash script which tests download speeds and figures out the faster mirror servers for you.
pacman -S pacman-contrib

# Writes the 10 best mirror servers into /etc/pacman.d/mirrorlist.
rankmirrors -n 10 /etc/pacman.d/mirrorlist.bak | tee /etc/pacman.d/mirrorlist

# Sanity check the file contents:
cat /etc/pacman.d/mirrorlist
Installing Arch Linux
Run the pacstrap command below. The pacstrap is specifically used for creating a new system from scratch. which This will take some time.
pacstrap -i /mnt base base-devel linux linux-lts linux-headers linux-firmware amd-ucode sudo nano vim git neofetch networkmanager dhcpcd pulseaudio bluez wpa_supplicant
- Substitute
amd-ucodeforintel-ucodefor Intel processors.
Generate Filesystem Tables
The /etc/fstab file contains the configuration that defines how filesystems should be mounted during system startup.
genfstab -U /mnt >> /mnt/etc/fstabArch Chroot
Chroot to newly installed system: arch-chroot /mnt. The arch-chroot command wraps around chroot.
Chroot operations change the (apparent) root directory. When you chroot to a path /foo/bar, then /foo/bar becomes root and nothing in / or /foo is accessible anymore by any processes you launch in this new environment. We call this a ‘chroot jail’.
Timezone
Set the timezone.
# Search for your timezone along the path: /usr/share/zoneinfo.
ls /usr/share/zoneinfo

# Set your timezone by creating a symbolic link to `/etc/localtime` by running:
ln -sf /usr/share/zoneinfo/Australia/Sydney /etc/localtime

# Synchronises the hardware clock with the system clock.
hwclock --systohc
Note that hwclock directly modifies the CMOS chip, whereas timedatectl doesn’t.
Localisation
In /etc/locale.gen uncomment en_US.UTF-8 UTF-8 and other locales you want, like en_AU.UTF-8. A ‘locale’ in this context is a bunch of settings that define the language, character encoding, date format, and other things your system should use.
Then run:
locale-gen
echo LANG=en_US.UTF-8 > /etc/locale.conf
export LANG=en_US.UTF-8
Adding a User
Set root user password and make a new user
passwd                                     # → prompts you to set the root user password.
useradd -m <username>                      # → makes a new user without a password.
passwd <username>                          # → prompts you to set the new user’s password
usermod -aG wheel,storage,power <username> # → adds the new user to a set of groups.
Now, run visudo to edit the sudoers file with Vim and uncomment the line: %wheel ALL=(ALL:ALL) ALL.
Network Config
Set the hostname with: echo arch > /etc/hostname → where ‘arch’ is the name I’ve chosen for my PC.
Now, populate the /etc/hosts file which contains hostname → IP address mappings.
# Static table lookup for hostnames.
# See hosts(5) for details.

127.0.0.1     localhost
::1		      localhost
127.0.1.1	  arch.localdomain	localhost   # Substitute arch for your chosen hostname.
GRUB
We’re installing GRUB to /dev/sda1 here.
mkdir /boot/efi
mount /dev/sda1 /boot/efi/

# Confirm that the boot partition has been mounted at /boot/efi.
lsblk

# Install Grub.
pacman -S grub efibootmgr dosfstools mtools
Now, in the file /etc/default/grub, uncomment GRUB_DISABLE_OS_PROBER=false so that Windows is discoverable by GRUB.
pacman -S os-prober
grub-install --target=x86_64-efi --bootloader-id=grub_uefi --recheck

# This should report a line like 'Found Windows Boot Manger on ...'.
grub-mkconfig -o /boot/grub/grub.cfg
Enable Network Services
systemctl enable dhcpcd.service
systemctl enable NetworkManager.service
⚠️ I wasn’t able to have wifi working post-installation. I solved it with the help of this thread.
Clean-Up
exit             # Get out of the chroot environment.
umount -lR /mnt  # Unmount all partitions.
Shut down, eject the installation media, then boot into Arch Linux from the GRUB menu (at this point, you should be able to boot between Linux/Windows).
Now you’ll need to get everything else working… like bluetooth, graphics card drivers, etc. See Arch Linux Post-Installation.
Post-Installation
Here’s a personal checklist for getting a proper setup up and running. This sections contains some basic notes on how I got the things below completed.
- Set up i3.
- Set up Polybar or another pretty i3 menu system. Can use Picom to make the bar transparent.
- Set up
yayso that you can install AUR packages. - Set up version control on all your dotfiles.
- Set up fonts.
- Get audio working.
- Get bluetooth working.
- GUI for tweaking settings: network, bluetooth, sound, displays, peripherals (mouse, keyboard).
- Could write a TUI selector to select which settings GUI to launch and make an i3 binding to launch it, and save this selector to GitHub Dotfiles repo.
- Multi-monitor setup.
- Write a script that selects, based on number of inputs, which screenlayout script to run.
- Set higher refresh rates.
- Fixing screen tearing on all monitors. Video.
- App launcher menu. Consider installing rofi and some extensions on it like
rofimoji,rofi-theme-selector, https://github.com/adi1090x/rofi, papirus-icon-theme, etc. - Extra functionality:
- Emoji picker.
- Set up redshift to reduce blue light emission.
- Set up desktop notifications with Dunst.
- Things to make aesthetic:
- Terminal emulator.
- App launcher menu.
- System bar.
- Misc:
- Set up logid for MX Master 3 mouse configuration.
cbonsai- Mounting Google drive on the local filesystem with
rclone. - Set up a proper forced shutdown time with adequate warning
- Cool retro term (source).
See also Personal Arch Linux Setup for more non-essential things I did to customise my system. See UNIX Ricing for making Arch Linux aesthetic.
Desktop Environment
A desktop environment (DE) is basically a user-friendly GUI that ships with an app menu, wallpapers, widgets, etc. which enables you to use your mouse. It’s really just a frontend, it doesn’t add any additional core functionality. Without a desktop environment, you’re stuck with using the terminal, however using window managers without a full-blown DE can help optimise your workflow.
- Desktop environments are usually not coupled to the Linux distribution you’re using. You can use most desktop environments regardless of whether you’re running Ubuntu or Kali.
- Linux servers typically won’t have a desktop environment. It’s just a waste of computing resources, especially if its purpose is to run some web server 24/7 that needs every bit of RAM it can get.
Popular Desktop Environments:
- GNOME — minimal and pretty. Ubuntu uses this by default.
- Xfce — has a lower RAM footprint (however you still cannot beat window managers in performance which requires only ~50MB instead of hundreds).
- KDE — highly customisable. Seems to be recommended most often by Arch Linux users.
- Budgie — modern and pretty.
i3
See i3. Install i3 plus some of its dependencies.
sudo pacman -S xorg-server xorg-xinit i3-wm

# In ~/.xinitrc, ensure you have a line that starts i3:
echo "exec i3" > ~/.xinitrc

# Start i3.
startx
To get i3 to run on system startup instead of needing to manually start it with startx, you can install a Arch Linux like LightDM.
i3 Extensions
You can install the following things to improve your i3 setup:
i3lockori3lock-colorfor a lockscreen.i3blocksorpolybar
Audio
sudo pacman -S pipewire pipewire-pulse pipewire-jack pipewire-alsa pipewire-audio
systemctl --user --now enable pipewire pipewire-pulse- Not sure whether all of these are necessary.
PulseAudio & PipeWire
To have audio on your system, you need a sound server. They bridge the gap between your hardware and your applications. PulseAudio and PipeWire are commonly used sound servers in Linux.
- PipeWire is newer than PulseAudio.
How do you check you’re using Pipewire? Run pactl info and see if it says something like Server Name: PulseAudio (on PipeWire 0.3.80).
To control volume, you’d use these commands, for example:
pactl set-sink-volume @DEFAULT_SINK@ +5%
pactl set-sink-volume @DEFAULT_SINK@ -5%
Bluetooth
Follow the steps to get audio working first.
sudo pacman -S bluez bluez-utilConnection:
I paired and connected bluetooth through bluetoothctl as suggested by the official guide. I encountered the error bluetoothctl: No default controller available and had to use the legacy package, bluez-util-compat. I also could not successfully connect to my headset initially, but this was solved by simply installing pulseaudio-bluetooth (source).
Audio crackling: I experienced serious crackling due to the interference of WiFi and bluetooth when connected to a 2.4GHz network.
- I initially fixed this by using 5GHz as suggested by the official guide. I didn’t use this solution long-term since the 5GHz connection was less reliable for me due to physical obstructions and distance from the router.
- I don’t know exactly what worked, but I tried replacing
pulseaudiowithpipewireby runningsudo pacman -S pipewire-pulse pipewire-alsa(source). - Automatic bluetooth controller power-on: I just followed the official guide.
NVIDIA Proprietary Drivers
My graphics card is GeForce GTX 1060 6GB. By default, the nouveau drivers are used. I had terrible web browser performance (even with hardware acceleration turned on) which indicated that I might need to adopt the proprietary NVIDIA drivers. I couldn’t use Figma or view websites using three.js for 3D rendering.
I struggled for hours with this. When I followed the main installation instructions in the official NVIDIA guide, startx would no longer work and I’d be met with a blank screen and a blinking cursor on boot. My mistake was not carefully reading the subsequent information below the main installation guide. In the end, I’m not sure how I got it working but these were the main things I did:
- Install
nvidiaandnvidia-utils. This automatically blacklists nouveau from being used. - Ran
nvidia-xconfig.- NEVERMIND. I tried this again and it broke Xorg. Don’t do this.
- Added the kernel parameter:
nvidia-drm.modeset=1. I did this by modifying the grub config file at/etc/default/gruband setting:GRUB_CMDLINE_LINUX_DEFAULT="loglevel=3 quiet nvidia-drm.modeset=1"
I confirmed that the proprietary drivers were in use instead of nouveau by checking the output of lspci -v.
05:00.0 VGA compatible controller: NVIDIA Corporation GP106 [GeForce GTX 1060 6GB] (rev a1) (prog-if 00 [VGA controller])
	Subsystem: eVga.com. Corp. Device 6161
	Flags: bus master, fast devsel, latency 0, IRQ 77, IOMMU group 14
	Memory at fb000000 (32-bit, non-prefetchable) [size=16M]
	Memory at d0000000 (64-bit, prefetchable) [size=256M]
	Memory at e0000000 (64-bit, prefetchable) [size=32M]
	I/O ports at e000 [size=128]
	Expansion ROM at 000c0000 [virtual] [disabled] [size=128K]
	Capabilities: <access denied>
	Kernel driver in use: nvidia
	Kernel modules: nouveau, nvidia_drm, nvidia
As further visual confirmation, I ran sudo pacman -S virtualgl and executed a 3D rendering test with glxspheres64.
I had noticeable screen tearing on all 3 of my monitors. I fixed it by running the following (sourced from the official guide’s suggestion). The command below is an example for my setup:
# I have 3 monitors at resolutions: 2560x1440, 3840x2160, 3840x2160.
nvidia-settings --assign CurrentMetaMode="\
HDMI-0: nvidia-auto-select +0+0 { ForceFullCompositionPipeline = On }, \
DP-0: nvidia-auto-select +2560+0 { ForceFullCompositionPipeline = On }, \
DP-4: nvidia-auto-select +6400+0 { ForceFullCompositionPipeline = On }"
Update (Nov 2023): I reinstalled Arch Linux recently and spent an ungodly amount of time install Nvidia drivers. The instructions from above didn’t quite work for me. Here’s a collection of the steps I took:
- Blacklist nouveau.
- Install
nvidia-dkmsandnvidia-utils.- Check your version of nvidia using
sudo pacman -Q | grep "nvidia". I found out that the version 545 at the time I tried to set this up was problematic and could not be loaded. Afteryay -S downgradeand runningsudo downgrade nvidia-dkms nvidia-utilsand picking version 535, it worked.
- Check your version of nvidia using
- Adding the kernel parameter,
nvidia-drm.modeset=1, and then runningsudo grub-mkconfig -o /boot/grub/grub.cfg. - Do everything else in this guide: https://github.com/korvahannu/arch-nvidia-drivers-installation-guide.
Multi-Monitor
I was not bothered to learn how to use the xrandr CLI, so I just installed and used a simple GUI, arandr to create the correct monitor layout. I saved the layout into ~/.screenlayout/main.sh, used chmod 755 ~/.screenlayout/main.sh, and added exec_always ~/.screenlayout/main.sh to the i3 config file so that it would always be run.
I had the following setup at the time:
- Left monitor (2560x1440) at DVI-D-0.
- Central ultrawide monitor (3440x1440) at DP-0.
- Right monitor (2560x1440) at DP-4.
Terminal Emulator
Terminal emulators are programs that let you use a shell from Xorg. They make your shell prettier and more user-friendly by giving you theme customisability (transparency, colour schemes, etc.), tabs, power user shortcuts, etc. Some examples of popular terminal emulators include:
- GNOME terminal (default for GNOME).
- Konsole (default for KDE).
- Alacritty. This was the one I went with.
- xterm.
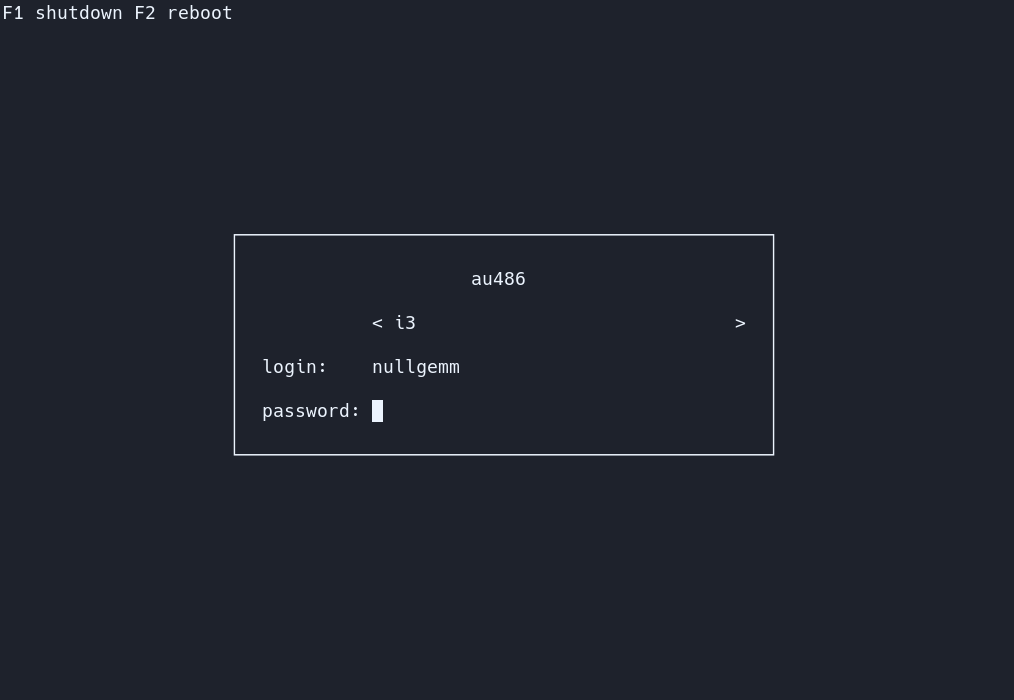
Display Manager
The display manager is the login GUI that might additionally handle things like letting you choose which desktop environment or window manager to load.
There are many options like lightdm, gdm (for GNOME), sddm (for KDE). I went with the ly display manager because it’s very simple and sleek-looking.
To set up Ly:
sudo pacman -S lysudo systemctl enable lysudo systemctl start ly
File Manager
I didn’t overthink this and chose the familiar default file manager that ships with Ubuntu, nautilus. There are popular alternatives like dolphin and nemo.
App Menu
rofi is a good choice for the app menu.
sudo pacman -S rofirofi -show runto show all available programs to run.
Extensions
- Emoji picker!
rofimoji
Network
NetworkManager ships with a daemon, the nmcli CLI and nmtui GUI. Use either to explicitly connect to different access points or see what access points are available to your device.
systemctl enable NetworkManager.service    # Enable the daemon which will automatically connect you to an available network.

nmtui                      # Launch the curses-based GUI.

# **═════ nmcli ═════**
nmcli connection           # Shows a list of available access points and which one you're connected to.

nmcli device wifi connect <access_point> password <password>     # Connect to a different access point.

# Rescan for connections.
nmcli device wifi rescan
nmcli device wifi list     # List all connections. Source: https://superuser.com/questions/164059/how-to-force-network-manager-to-rescan-connections.
Network Speed Issues
I had so many issues with network speed and reliability.
The recommended way to test speed is to use speedtest-cli.
Things I tried doing to resolve my network speed issues:
- Setting iwd as backend to NetworkManager. Reddit.
- Install
crdaand editingetc/conf.d/wireless-regdom. Reddit - Ensured that Fast Startup is disabled in Windows Power Options, and Fast Boot is disabled in the BIOS (UEFI).
- Messed with adding
/etc/modprobe.d/iwlwifi.conf. - Downloaded Linux Intel Ax200 firmware files (.ucode files) and moved them into
/lib/firmwareand rebooted. Pretty sure I did this incorrectly the first time. - Disabling bluetooth service.
The issue turned out to be bluetooth-wifi interference. After running rfkill block bluetooth, I noticed that the wifi connection was more stable and reliable.
Window Managers
Window managers let you snap and automatically resize windows instantly and intuitively. They also minimise/eliminate the need to use your mouse to resize windows and get them where you want and set keybindings to speed up your workflow.
Popular Window Managers:
- i3 ← I chose this one because it seemed to most popular and beginner-friendly.
- AwesomeWM
- DWM
- Qtile
- Xmonad
VSCode
Everything worked for me out of the box, except sign-in and settings sync.
- Sign-in: I followed VSCode’s troubleshooting guide to resolve keychain errors.
- Settings sync: I was able to sync everything (settings, keybindings, etc.) except for extensions. I could not find a solution for this, however I worked around it fairly easily by doing the following:
- Bring up the VSCode command palette and run:
Settings Sync: Show Synced Data. Find the latestextensions.jsonremote file, then save it to a local file. Pass that JSON through a pipeline ofsedcommands to get only the id field, then run the VSCode CLI command:code --install-extension <extension_name>.
- Bring up the VSCode command palette and run:
Printer
I installed cups, cups-pdf, avahi, nss-mdns. Then, I made the necessary edits to /etc/nsswitch.conf and started and enabled avahi-daemon.service, cups.service. I checked that my printer was discoverable over the network by using avahi-discover and I was able to print PDFs afterwards.
Compositor
A compositor is the software that gives you graphical effects you’d typically see in a desktop environment, like transparency, window animations, etc.
Picom is a popular and stable compositor for Xorg. It lets you have things like transparent, blurry, rounded windows.
- Config file at
~/.config/picom/picom.conf.
Dotfiles Git Repo
The nicest way I know of to version control all your dotfiles and keep multiple machines synced on the same config is to use a Git repo, then mass-symlink your dotfiles into that repo using GNU Stow.
See my GitHub repo: github.com/Tymotex/unix-dotfiles.
Fonts
You may not be able to see emojis in your terminal, browser, etc. To fix that, install the following fonts, for example. Restarting your apps should be enough to get them to show.
sudo pacman -S \
	ttf-dejavu \
	adobe-source-hand-sans-cn-fonts \
	adobe-source-han-sans-kr-fonts \
	adobe-source-han-sans-jp-fonts \
	noto-fonts-emoji

# List fonts:
fc-list
Notifications
You can install dunst to handle system notifications.
sudo pacman -S dunst.- On system startup, run
dunstas a daemon. This listens for events and pushes a notification to your screen. You can test this by runningnotify-send "Hello" "World".
Other Language Input
I installed
I’ve install fcitx which runs as a daemon. I had to install fcitx-rime to get it working.ibus and ibus-pinyin.
- Had to run
ibus-setupto add a new Pinyin keyboard and set Ctrl+Space to change input.
System Maintenance
You need to regularly run commands to maintain a stable system over time. The basics are:
systemctl --failed     # Look for failed systemd services
pacman -Syu            # Upgrading does carry risks.
pacman
The Arch Linux package manager.
pacman -sS <package_name> # Queries for downloadable packages. Doesn't install anything.yay
TODO.
yay -S $PACKAGE   # Installs a package.
yay -R $PACKAGE   # Removes a package.
AUR
Arch User Repository is a community repository for a bunch of useful packages that can be installed with pacman.
TODO.
Troubleshooting
In my experience, everything was able to be solved through forums on bbs.archlinux.org and the official Arch Linux wiki, given patience and tweaking the Google search query.
Arch-Chroot Rescue
A powerful way to debug and save an Arch Linux installation when it won’t boot is by mounting the root partition from an installation media and then chrooting into the main installation’s root filesystem.
fdisk -l    # Confirm that you know where the boot loader and Arch installation's root partition is.
lsblk       # Alternative to `fdisk -l`.

mount /dev/sda6 /mnt         # Mount the root partition (for me, this is sda6).
mount /dev/sda1 /mnt/boot    # Mount the boot loader partition.
arch-chroot /mnt             # chroot into the root partition.

# From here, try to inspect logs, invalid configuration files, etc.
# Once done:
exit                         # Exit the chroot environment.
umount /mnt/boot
umount /mnt
reboot
I misconfigured lightdm and used this method to save my Arch installation.
Open Problems
These are some problems that I have not been able to solve.
- Running my 4K monitor at higher refresh rates (144Hz).
- I know for sure this works on Windows as part of my dual-boot system. The cable is fine, the GPU is fine. It looks like the support for higher refresh rate is just missing for Linux at the moment, but I may be wrong.
xrandrdoesn’t show that 4K at 144Hz is supported.
- I know for sure this works on Windows as part of my dual-boot system. The cable is fine, the GPU is fine. It looks like the support for higher refresh rate is just missing for Linux at the moment, but I may be wrong.